Heane's Been Baking

Heane's Been Baking

Tuesday 25 February 2014

White Chocolate & Raspberry Checkerboard Cake

My next birthday creation was for Phoebe and came soon (too soon! 5 days!) after making the chocolate orange masterpiece... talk about slave driving! It's hard being the resident baker! (Not really, I freaking love it!) 

I decided that we'd worked our way through enough rich chocolate and that the next cake called for something jammy. I had seen a checkerboard "how to" post on Pinterest and I was itching to try it! 

The Plan:-


The Ingredients:-

I decided on a basic sponge recipe for this cake. The recipe is so ingrained in my brain, and as it was my granny that taught it to me, it's one of the few times that I still work in ounces. 

For the sponge:

200g/8oz soft marg or butter
200g/8oz caster sugar
200g/8oz SR flour
4 eggs
1 tsp baking powder
Pink food colouring

For the Filling:

400ml cream
400g white chocolate
Raspberry jam (seedless is probably best for filling cakes)
1 Packet of Raspberry fruit flakes 

I took this ganache recipe from a BBC recipe, although I had a few problems with it... (stay tuned for a disaster)


The Method:-


  1. Begin with the ganache so that it has time to cool and thicken while you're making the sponges. Put the chocolate and cream into a bowl and heat gently over a bain marie until melted. Set aside, and come back to it later... (Hopefully not finding what I found... as you will see below... oh the suspense)
  2. I always begin by creaming together half the sugar and half marg until light and fluffy. (Some prefer to use the all-in-one method but I always find the creaming method give you a much lighter sponge and it's the method I have always used!) 
  3. Add 2 of the eggs one by one, mixing well in between.
  4. Sift in half of the flour, half tsp of baking powder and fold in to the mixture. Add a few drops of pink colouring or more, depending on how bold you would like the colour to be. 
  5. Split the mixture between two tins (if you're lucky enough to have two... or you could do one, wash up, and then the other, like me!) and bake for roughly 15-20 mins in the oven or until the sponge is, well, spongey when you press it, or equally you could insert a skewer and you know it's ready if it comes out clean. 
  6. Repeat this process with the other half of the ingredients, leaving out the colouring so that you have 4 thin sponges. 2 pink, 2... not pink. 
  7. Now's the fun/complicated bit...  

Creating the Checkerboard:-

You need to cut a ring from each of the cakes. You could use a ruler, but my mind isn't mathematical and I got fed up measuring. I decided to rely on my eyes! So, cut a circle on the cake about and inch or two from the edge. And another about an inch from the centre so that your sponge is now in three parts and you can remove the middle ring. Do this with each of the cakes and begin rearranging. Take the pink ring and put it with the plain sponge, and visa versa. 

Now you are ready to assemble, so you return to the hopefully thickened ganache. Well, mine wasn't. At all. So trying not to panic, I turned a blind eye, and assembled the layers, with a nice layer of raspberry jam and then a dribble of ganache. Which then proceeded to leak everywhere. 

To cover the disastrous sides I made some white chocolate shards by spreading white chocolate onto greaseproof paper. I gently peeled the shards of and stuck them around the edge of the cake. 

With a pool of ganache sitting around the cake, acting as a sort of moat... I proceeded to stress. Nowhere online, could I find a way to save my runny ganache and as a last ditch attempt I reached for my electric whisk. Cream thickens when you whisk it... there's cream in the ganache... so it should thicken right? RIGHT! I arrived and wonderful, mousey, thick, white chocolate ganache and the cake was saved! 

I spread the lovely stuffy across the top and loaded the rest into a piping bag (Yes, it was pipable!) and piped decoration around the edges. 

A sprinkling of fruits flakes later and I had a lovely White Chocolate and Raspberry Cake... (albeit with a moat)


Job Done!
TIP OF THE BAKE : Whisk Ganache to thicken it!! 

Until next time xx


Sunday 9 February 2014

Les Macarons, le premier essai!

I said I would, and I have! I have dedicated my sunday to making these sweet little french treats! I have spent my past two summers in Corsica with, no exaggeration, the Macaron Queen! I definitely fell on my feet with this aupairing "job". That's if beach by day, baking by evening and dining al fresco at night can really be considered a job! Delphine is definitely the best baker I know and has managed to perfect her macarons. If I send her pictures of a batch of biscuits or cupcakes I've made, she will immediately reply with her latest AMAZING macarons! Then again she does have the illusive Kitchen Aid... yes, that's definitely the reason. I would have to say that whereas Granny Spongecake taught me the basics of baking, Delphine has some seriously good baking tips and I regularly message to pick her brain during a challenging bake! 

So, the Macarons... 

I decided not to follow Delphine's unbelievably difficult and pernickety recipe and decided instead to go down the "macarons for dummies" "easiest ever macarons" "fool proof macarons" kind of route. I decided I would go for the BBC recipe (link below) from Lorraine Pascale's show "baking make easy", perfect. 

Tips and modifications:

The recipe was pretty easy to follow and worked well although there are a few things that aren't clear in the recipe. 

http://www.bbc.co.uk/food/recipes/macaroons_04669
  1. Take extra time to mix the almonds with the icing sugar and egg to avoid the "painted wall" effect. (Hindsight is a wonderful thing - as you will see below)
  2. If you are using colour, add it to the almond paste and not the meringue, so not to risk losing too much air. If you are adding colour, add a lot! (hindsight again). When you then add the meringue the colour becomes a lot paler and (as you will see below) the colour may not be as bright as expected. 
  3. When making the syrup, do not stir. Swirl the pan the help the sugar dissolve. (There's that hindsight again, take a look below!) 
  4. I suggest, when baking the macarons, to instead set the oven to 155ºc fan and instead of leaving the oven door ajar to let out the moisture as suggested, leave the door shut and open 3 times during cooking for a few seconds to let out the moisture. Depending on the oven, I would also leave the macarons to bake for at least 16 mins. 12-15 mins was definitely not enough in my case! 
The filling - 

You can fill these little guys with anything you want. I decided to continue my chocolate orange theme and fill them with the chocolate orange ganache I used for Dan's cake. I have reduced the quantities so that you can buy a little pot of 150ml double cream which is more than enough for the quantities in the Pascale recipe. 

150ml cream
138g dark chocolate (cheap as you like!)
1tsp orange extract

Put the chocolate and cream over a bain marie with the extract until melted. Leave to cool and pipe! Easy as pie! 

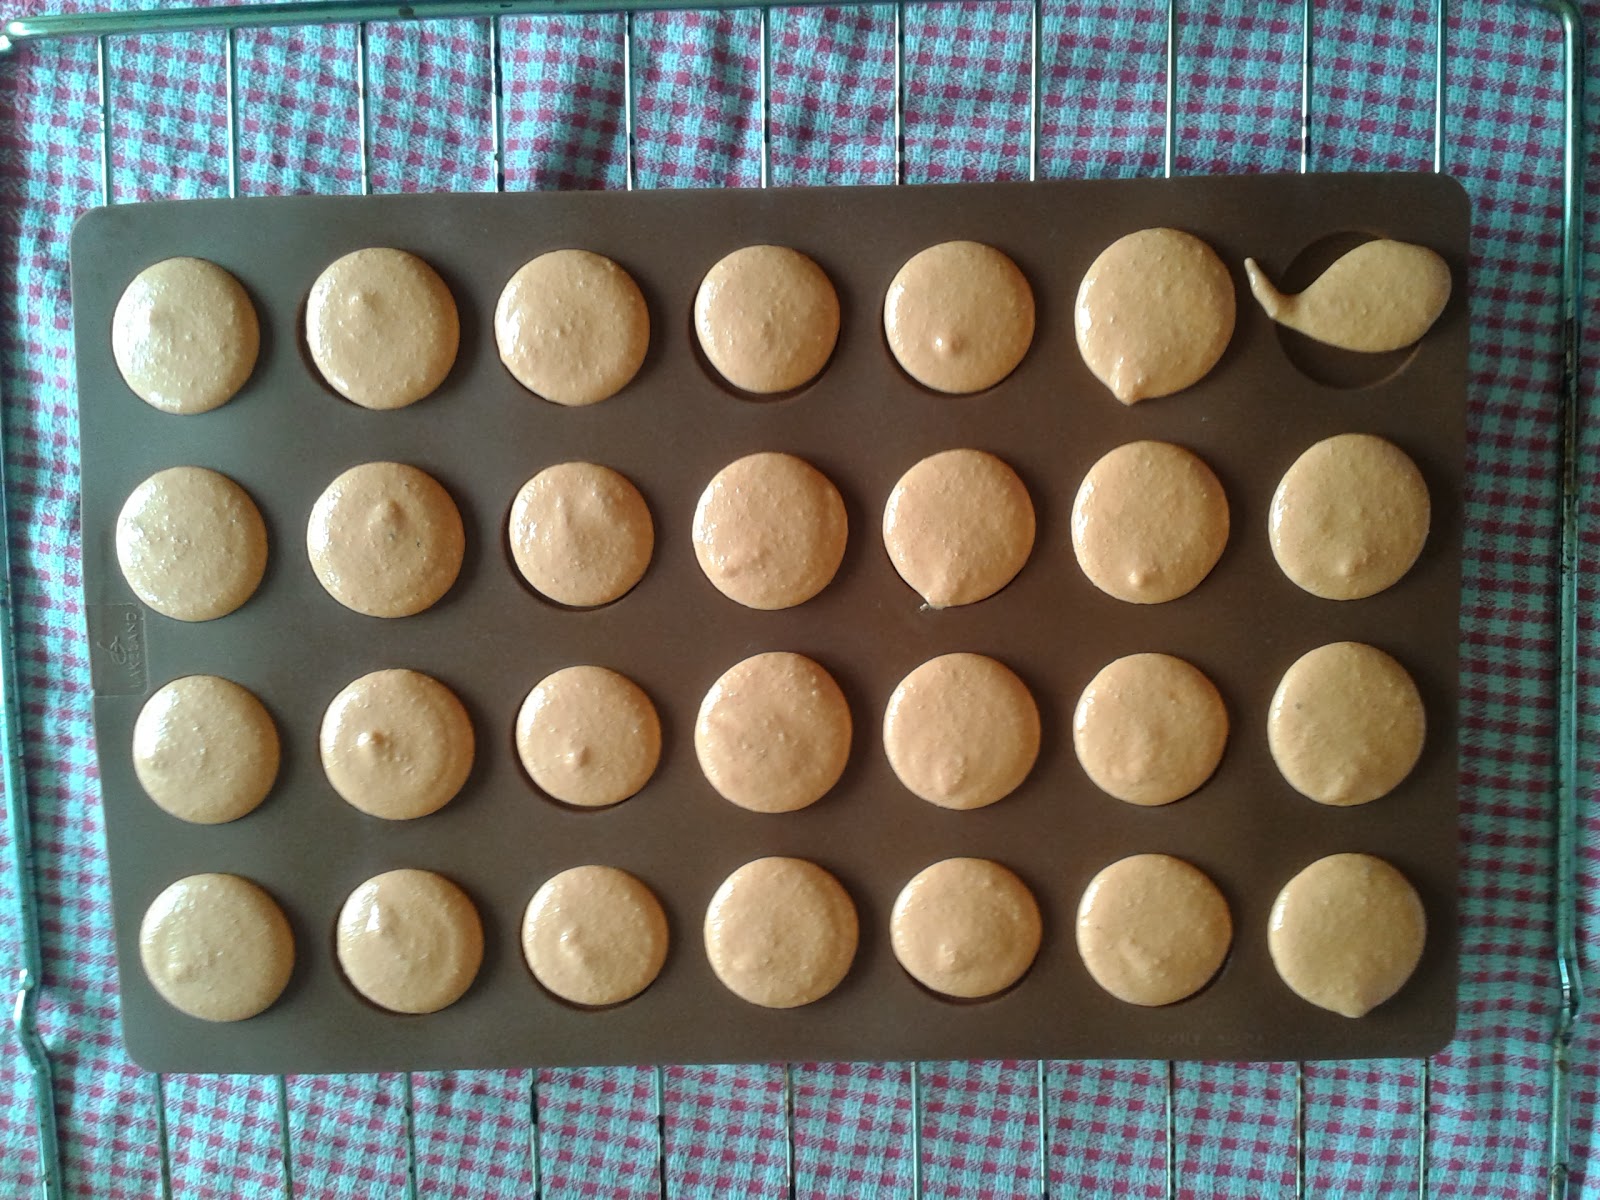
And here they are, the little cuties... 

Aren't they cute! If ever so slightly reminiscent of burgers!


Can you tell which one was the first?

First attempt at sugar syrup! (Don't use a spoon!)

Never waste anything! Make a cute little tadpole! 

Et voilà, mes premiers macarons! 

Friday 7 February 2014

Chocolate Orange Birthday Cake

My first birthday cake creation was for my housemate, Dan. Chocolate Orange obsessed, and known by way too many people ( as he ended up receiving about 20 chocolate oranges, having bought himself chocolate orange cookies and ice lollies... as I said, obsessed.) I therefore planned a wonderful Chocolate orange cake with a few little surprises within, not knowing that everyone else was on the same wave length! It did, however, go down a treat and here's how I did it... 

The plan:


The ingredients:

The method:

Firstly the chocolate sponge:
The orange cake pops:
  • 100g/4oz softened butter
    100g/4oz caster sugar
    100g/4oz self-raising flour
    1tsp baking powder
    2 large free-range eggs
    1tsp orange extract
    Either orange colouring or in my case a mix of red and yellow (bare in mind that the colour fades during baking)
    You will also need a Cake pop mould. I bought mine off of Amazon.co.uk and it works brilliantly! 

The chocolate orange ganache:

    300g dark chocolate (I used the cheapest available and it was still great!)
    350ml double cream
    1 tsp orange extract (or to taste, depending on how strong you want the flavour)

The method:
  1. Preheat the oven to about 180ºc fan depending on your oven. 
  2. Firstly make the basic sponge mix by creaming together the butter and sugar. Add the eggs one by one, mixing in between and then sift in the flour and baking powder and mix well. Add the orange extract and then gradually the colouring to give you a night bright orange mix. 
  3. Spoon the mixture into one side of the cake pop tray filling the moulds so that in actual fact they are only half full when you place the other side on top. 
  4. Bake the cake pops for around 10-15 minutes checking them with a cocktail stick inserted into the whole in the top of the tray. 
  5. To make the chocolate sponge, mix the sifted cocoa with 200ml boiling water in a bowl. Add the remaining ingredients and beat until the mixture resembles a smooth, thick batter. 
  6. Line your two baking tins with baking parchment and smooth a thin layer of batter over the bottom of each. Carefully arrange the cooled cake pops in the tins and cover evenly with the remaining chocolate cake mix. 
  7. Bake the cakes in the oven for 35-40 minutes, or until well risen and a skewer inserted comes out clean. Be aware that the cake pops do float and therefore the top  of the cake will not be smooth. When assembling the two layers of the cake be sure to sandwich the tops of the cakes together so that the smooth bottom of the cake is on top. 
  8. To make the ganache: usually they say to boil the cream and then pour over the chocolate. I have found that putting both the chocolate and the cream over a bain marie and stirring works perfectly well!
  9. Once the cream and chocolate are combined, add the orange extract and leave to cool and thicken. This can take a while so it might be best to start with the ganache if you are working on a time limit! 
Arranging the cake pops


Cake iced with chocolate orange ganache


  • I topped the cake with a Terrys Chocolate Orange and it went down a storm! Happy 22nd Birthday Dan! xx


Wednesday 5 February 2014

Baking Doughnuts Hollywood Style

This weekend I decided to tackle the doughnut. Naturally, I followed Paul Hollywood's recipe having seen the Sport Relief bakers making then on The Great Sport Relief Bake-off. If celebrity novice bakers could make them, then surely I'd be able to as well! 

What did these bakers have that I lacked? A wonderfully pretty Kitchen Aid and a deep-fat fryer of course. Well, as a student, working with the basic kitchen ware I have comes pretty naturally so I was in no way discouraged! 

The dough didn't prove as much as I would have hoped... but then I am dealing with student heating. I.e. none. 

In the recipe Paul suggests heating the oil to 180ºc. Seeing as I had no way of measuring the temperature of the oil I would have to turn on the heat and hope for the best! Resulting in some very dense, dark brown, oddly shaped doughnuts! Needless to say these were the sad little guys left in the cake tin! 


Working with an electric hob also has its downfalls and controlling the temperature is definitely easier with gas! But you can see the difference frying the doughnuts on a lower heat. You can see the dough expanding as the yeast gets to work. If the oil is too hot there just isn't time! 

However, cold house, electric hob and lack of alliances aside... here they are, my first ever batch of doughnuts! 

http://www.bbc.co.uk/food/recipes/ring_doughnuts_95428


This weekend, having purchased my silicon sheet with little circles, I will be attempting the ever feared Macaron! Watch this space. Potential disaster to follow. 

Tuesday 4 February 2014

Anna Heane: Baking Queen

... well, sort of. In my house anyway! 

I'm Anna, a final year Modern Languages student studying at the University of Exeter in Devon baking for 5 hungry housemates! My biggest worry at the beginning of my final year? That my housemates wouldn't eat what I baked! Thankfully, that hasn't been a problem! I have promised each and every one of them a spectacular birthday cake, a lovely selfless act of kindness? Or simply an excuse for me to spend a day baking? I'd be lying if I said it wasn't the latter!

I have always loved baking. I used to spend a week at my Granny's house every year and we would bake flapjacks, bake well tarts, spongecakes and all sorts! We used to bake so much that until this day she is known as Granny Spongecake.

This year I want to tackle all the must-bakes! From doughnuts to macarons to pastries, all with help of my many Mary Berry cookbooks and everything I've learnt from avidly watching The Great British Bake-off! 

So, in the words of Mel and Sue... Ready, Set... BAKE!